Let’s start with the obligatory finished-product shot:
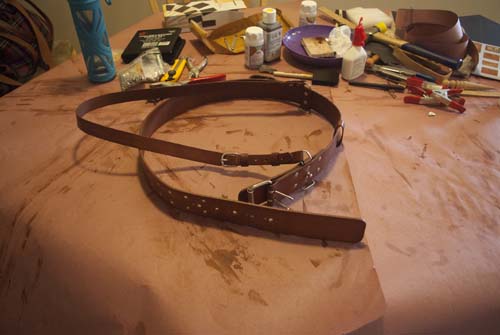
The finished product
So this all started when I’d been thinking about picking up a new hobby (ostensibly to make some leather bits for my own costume this year) and Patricia mentioned an idea she had for a monstrumologist costume. What she came up with was something that could do bandolier duty, but go with the awesome khaki safari jacket and pith helmet at the same time. After a little digging, I came up with an old fashioned Sam Browne belt, onto which we could always strap other accouterments.

Old school Czech military uniform, looking super dapper.
It’s a belt, two-tongued buckle, over-the-shoulder strap, and a little hardware. Can’t be that hard, right? (Famous
last words)
Here’s how it all came together…
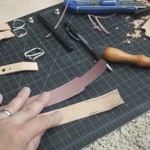
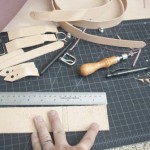
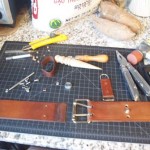
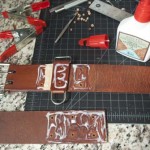
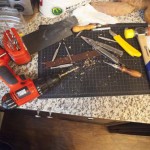
Step 1. Acquire tools, hardware, materials, and more of each of those things.
Turns out, there’s a fair bit of hardware involved in a Sam Browne style belt. Here’s the materials list:
- 2″ two-tongued roller buckle (nickel) × 1 ($3.20/ea)
- 3/4″ bridle buckle (nickel) × 1 ($0.90/ea)
- Sam Browne posts (large nickel) × 3 (I ended up using screw-backed rather than riveted posts) ($2.65/ea)
- 3/4″ D-rings (nickel) × 2 ($2.40/pack)
- 1″ strap keeper loops (nickel) × 2 ($2/pack)
- single cap rapid rivets (large nickel) × 10 ($6.40/pack)
- double cap rapid rivets (small nickel) × 1 ($6.40/pack)
- 10 oz 2″ undyed veg-tan strip (72″ length) × 1 ($36/ea)
- 6oz undyed veg-tan shoulder × 1 (actually pieces thereof, but not knowing that, I used part of a double shoulder I already had lying around) (~55/ea)
- Eco-Flo light brown waterstain × about 2 oz ($12.80/8.5oz)
- Acrylic Resolene × about 2 oz ($6.40/4oz)
- Neatsfoot oil × lots ($7.20/4oz)
- Patience × ∞
Total materials cost: roughly $70 plus the cost of the double shoulder bits (less than $10, considering)
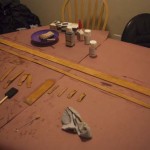
All of that, a ton of tools, and a lot of incidentals (cleaning supplies, paper for patterns and dye protection,
etc), and it was time to get started.
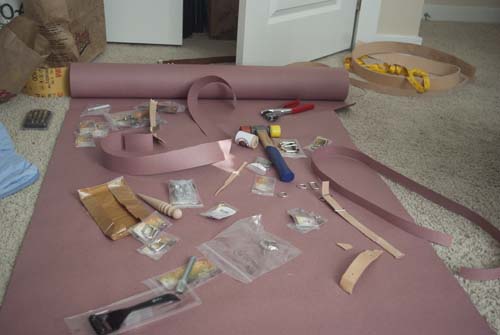
A fraction of the aforementioned ton.
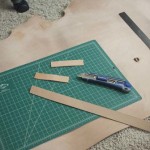
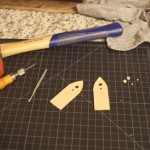
Step 2. Make a pattern
Rather than start cutting and potentially ruining a bunch of expensive leather, it’s easier to cut the pattern out
of heavyweight paper (Red rosin paper, $13/166ft at the Home Despot) and do some test layouts. According to the
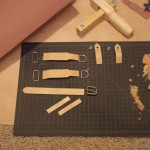
(hastily devised) pattern, there should be 11 parts to be cut:
- Main belt
- Main belt tongue (sits behind the buckle to protect clothing from it and vice versa)
- Main belt strap keeper
- Main belt ring keepers x 2
- Shoulder belt
- Shoulder belt spacer strap
- Shoulder belt strap keepers x 2
- Shoulder belt ring connectors x 2
Okay. No problem. Pattern devised, bits cut out, paper bits fit over and around metal bits to make sure things fit,
everything good so far. Time to start measuring and cutting the leather…
Patterns make everything easier
Mistake #1: Don’t cut until you’re 100% sure the pattern actually works.
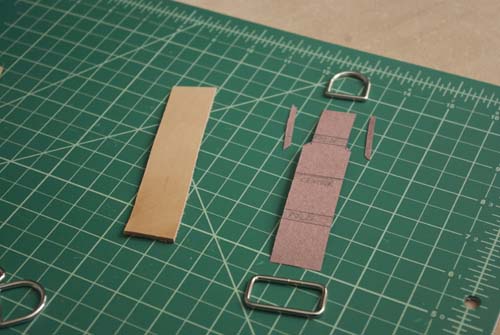
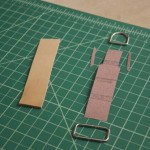
Turns out, the ring connectors (which wrap over the D rings to connect the shoulder strap and spacer to the belt)
need to be long enough both to wrap over the ring andto connect back to themselves and the strap. Attempt 1
was too small to do so, which I realized only after cutting and hole-punching both pieces. Oh well. Attempt 2 added
on a few extra inches of length to compensate.

Attempt #1, too short
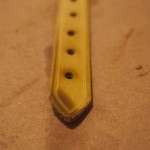
Mistake #2: Being cheap generally gives you what you’ve paid for.
Assuming that cutting those gently rounded points symmetrically would be easy to do without a strap punch turned out
to be a pretty grave misapprehension. On the other hand, the pointed strap ends are (mostly) out of sight, and get
rounded a little by burnishing later anyway, thus hiding the sloppy job that an X-Acto knife and a flimsy paper
pattern managed to achieve.
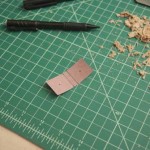
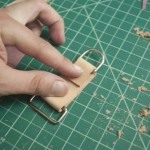
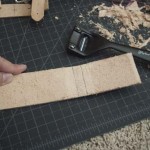
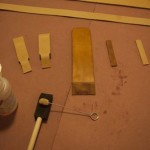
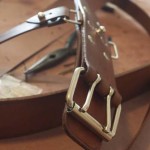
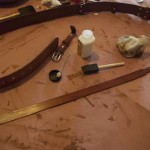
Step 3. Prep all the bendy pieces.
In this case, prep means “skive,” or in other words use a fancy razor to shave down the width of the leather until
it’s half its previous thickness at the bending point. You do this everywhere something wraps over a ring, bends
more than 90 degrees, or needs to be thinner (like the belt tongue). Turns out I really suck at skiving, but there’s
not much you can’t do with a good razor blade if you work at it long enough.
Mark it with pen, skive until marks no longer show, and repeat…
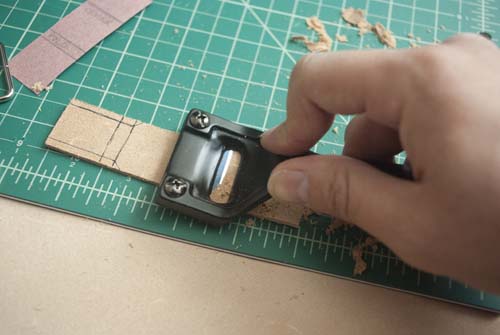
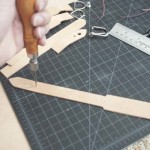
Step 4. Punch all the holes.
This meant disturbing the neighbors a lot with the loud banging from upstairs. Basically you set your cutting board
on a hard surface, preferably granite or marble, lay on the leather, line up a punch, and whack the back end of it
with a nonmetallic hammer until it goes through. This cuts the leather, while also slowly dulling the edges of the
punch. Not a big deal here, but it becomes relevant later in the game…
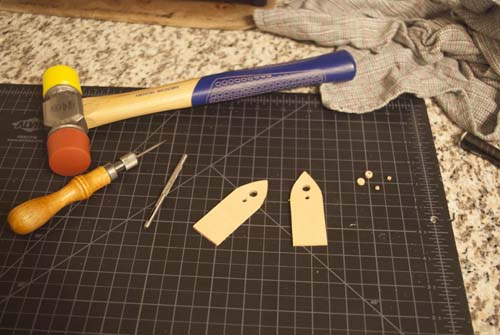
That includes the relief holes for the ends of cuts
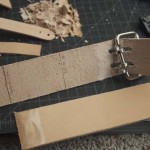
Mistake #3: Estimations and freehand cutting don’t mix well.
Cutting slots for the two tongues of the main belt buckle was a tricky process of estimation, as you have to factor
in both their (non-static) position as well as the very thick loops by which they are attached to the buckle frame.
The first set of holes didn’t manage to wrap fully around the aforementioned loops, so in true idiot fashion, I
decided to just freehand them larger. About 40% too large, as it turned out afterward. A little re-calculation and
skiving, though, and the bend point got moved down an extra 1/2″ or so to cover up the mistake, and as a bonus, the
extra space gives the tongues plenty of wiggle room.
Oops
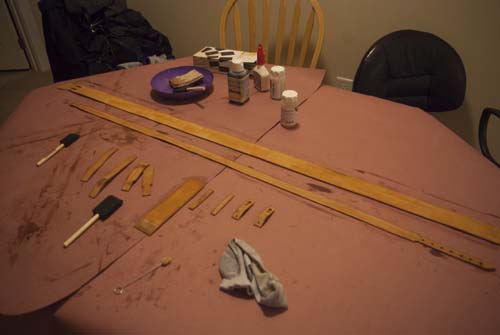
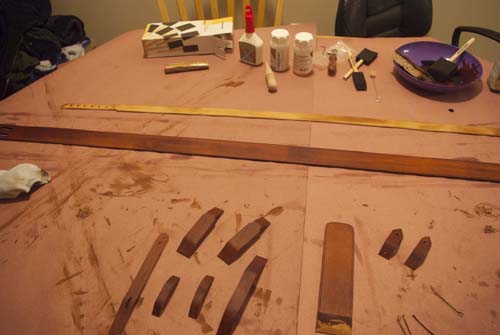
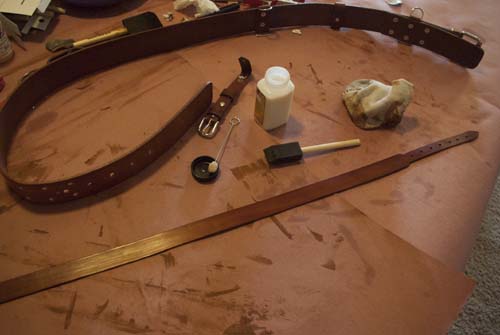
Step 5. Conditioning
To make the leather more pliable and easier to work with, you use a conditioner (in this case, neatsfoot oil) to
restore some of the moisture and natural oils to the piece. It’s particularly important in something like this which
is expected to flex and bend a lot under pressure. So, the kitchen table gets covered in paper, and the pieces all
laid out, then a set of foam brushes and wool daubers is used to evenly spread a very light coat of oil on each
surface. It also has the pleasant side effect of darkening the leather (permanently) wherever it sinks in. This
gives it a slightly darker base for the dying step later.
Mistake #4: Assuming I’m capable of an even coat.
This one’s pretty self-explanatory, but as it turns out, heavy veg-tan cowhide like the stuff being used here tends
to come out a bit dry, which means that it sucks up moisture in turn, and does so before you can blink. Running more
oil on top of a previously coated spot will also double up the darkening on it, which tends to mean a lot of
splotchy areas where brush strokes overlap or where a brush stroke begins after the most recent dip in the oil,
spreading more oil at the beginning than later in the stroke. Hopefully it gives it a weathered look, but I’m not
holding my breath there…
Splotch.
Step 6. Edging
Once all the pieces are cut out, skived, and hole punched (or at least marked for future punching, in any places
with uncertainty), it’s time to round off those harsh edges and do any decorative work. In this case, that meant
beveling the edges and adding a groove about 1/8″ in from the edges of the belt, strap, and spacer. This basically
involves slowly running a sharp, V-shaped blade along the edge of each piece at about a 45° angle while trying
to maintain uniform pressure the whole way. Not too hard on straight sections within reach, very tricky on curves
and corners. Once that’s done, you repeat the process with a sharp little groover, which is just a round point on a
handle with a little guide on one side to keep your aim from wobbling too badly.
Rough edging around the turns.
Mistake #5: Edging before test-fitting.
As it turned out, I’d somehow managed to badly mis-measure the length that the shoulder strap would actually need to
be to go over Patricia’s shoulder in costume. Thankfully, I’d made it too long (which is easy to fix, as you can
imagine). Unfortunately, I’d already done the edge work beforehand, which naturally then got hosed up on the tapered
portion of the back. Oh well. At least it’s just on the back, right?
Step 7. Coloring
Once the oil is dry, and you’ve flexed the leather a bit by hand to work it in deeper, it becomes time to add a
little color. In this case, I used a water-based stain for ease of use, cleanup, and dilution, and because it came
well recommended for use in combination with the neatsfoot oil. (Don’t ask me why oiling it should make it more
susceptible to water; I still don’t quite get that) The same issues with oiling tend to apply here, which
once again means some uneven dark spots.
Crazy dark by comparison to earlier.
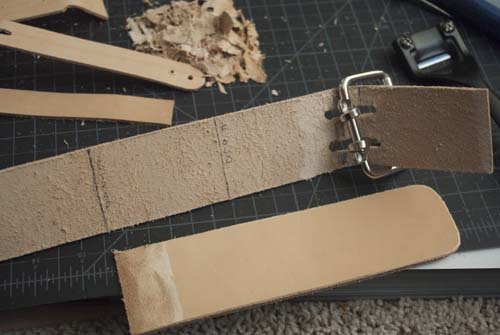
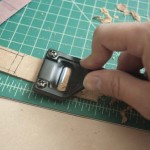
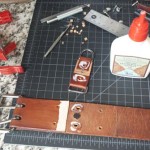
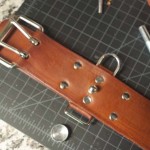
Step 8. Fastening
Now that everything’s properly colored, time to start sticking it all together! This meant wrapping and gluing the
strap rings and D-rings in their ring connector straps, fixing the belt buckles to their strap ends, installing the
Sam Browne posts, gluing and riveting the pieces together, and sewing up the strap keeper loops. For most of these,
this simply meant gluing up the places that would later get rivets, then banging the rivets into place.

Obligatory puppy tax, as the sights, sounds, and smells from the kitchen table were proving to be irresistible to the fluff butt.
Mistake #6: Not paying more attention to which side you’re gluing.
In an attempt to get the glue surface ready and photogenic, I neglected to make sure I was actually gluing the inside
edge of the belt tongue. Thankfully this kind of contact cement is pretty forgiving when attacked with a damp
paper towel within a few seconds of application. No major consequences on this one, thankfully.
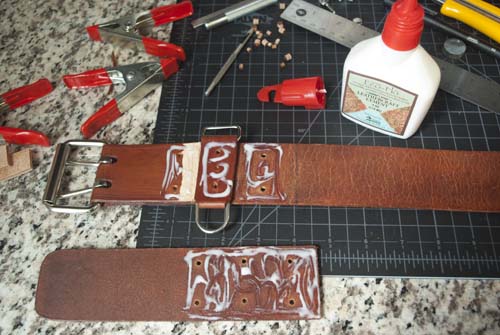
Not my brightest moment
Mistake #7: Assuming that the large size rivets will be the right size for what you want.
For all but two of the rivet locations, the large size rivets turned out to be far too long for their applications,
which meant trimming them down with the snip end of a pair of pliers and re-rounding the tubes. Unfortunately, the
remaining two locations had the opposite problem; the combination of belt, tongue, and (doubled) ring connector
strap turned out to be about the same width as the entire length of the rivet tube. This resulted in some panicked
extra pounding in order to attempt to squeeze the leather pieces tight enough together that the rivets could be
forced closed. Luckily, the gamble paid off. Less luckily, it did a good job of flattening the otherwise rounded
rivets along the way, a small but unsightly blemish.
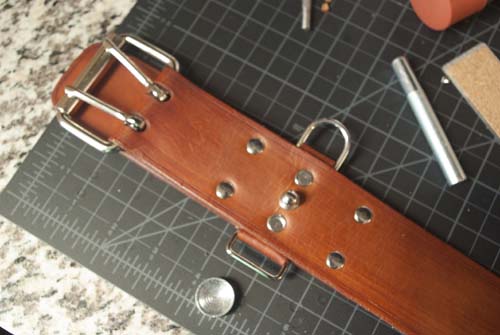
Notice the pinched-in center rivets
Mistake #8: Not just riveting or sewing on the leather strap keeper loops instead of letting them
float.
While the largest of the three strap keepers (the one on the main belt) was large enough to use one of the smaller
rivets to close up, the other two were just too small, which meant glue and stitching. As it turns out, stitching a
strap keeper of that size is surprisingly difficult when you don’t want to pierce through the center portion (which
would completely perforate and thus weaken the whole loop), but somehow it ended up getting done. Not too big of a
mistake, so long as nobody looks at the back side of the straps…
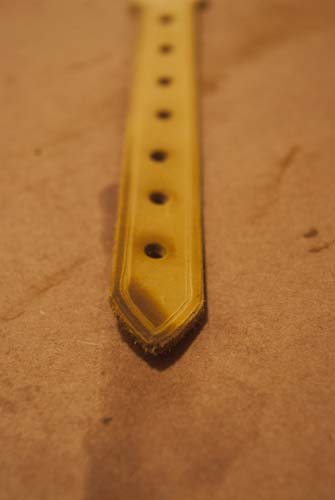
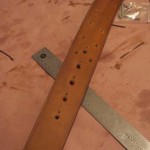
Step 9. Test fitting and belt hole punching
At this point, the whole apparatus was basically complete aside from the holes for the buckle tongues and for the
retention post right beyond the buckle (which snaps into holes on the belt’s end to help keep it in place around the
waist). This meant test fitting again (having learned from mistake #1 by this point), marking the right hole spot,
and cutting the 7 sets of belt holes (for use around more or less costuming) and their matching post holes.
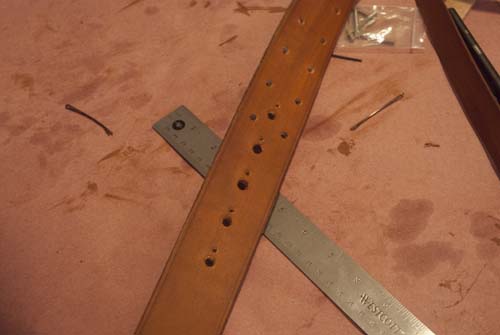
Turns out this style of belt requires a ton of holes.
Mistake #9: Don’t assume punches can handle thick stock without resharpening.
Again I made a bad assumption, this time that the punch edges, which were getting pretty worn by having to go
through layers of up to almost a half inch of leather at a time, would hold up through the whole process. Guess
again. The punch I was using for the tongue and post holes basically refused to bite about halfway through the post
holes, prompting me to try and come up with an alternative. Meantime, the previously punched holes turned out to be
slightly too small to work well, which only added to the trouble. Luckily, where there’s a drill, there’s a way. The
solution turned out to be “Use a hand drill to get the hole size you want, then use the edge beveler and a razor
knife to carefully shave off any rough edges that come as a result.
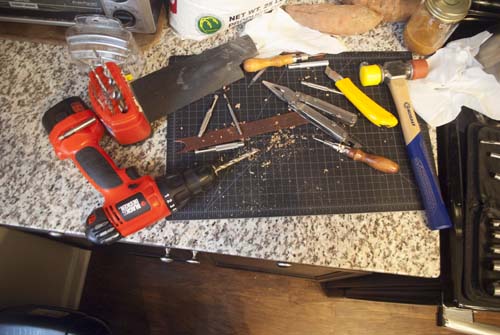
Handy drill bits
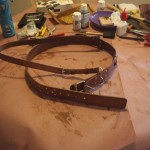
Step 10. Burnishing and Finishing
This is the last and, arguably, most tedious part; burnishing all the outside edges. What this involves is
essentially using some binding agent to slick down the rough fibers along all the edges and help to pin them in
place. In this case, it meant delicately painting some gum tragacanth on the edges, letting it dry, re-painting, and
repeating until a lightly moist (and well gummed) edge remained before attacking it with a wooden burnishing dowel
with swift back and forth motions until the edge is no longer rough to the touch and almost glistens. Once done, it
only needed a quick coat (or two) of acrylic Resolene to achieve a semi-gloss exterior while also helping to partially
weatherproof the belt.
Ooh, shiny!
Much elbow grease and many hours later, it was all done! I can honestly say that it was a fun project (and even more
fun to see Trish all decked out in her explorer gear), and one that taught a lot along the way. Now to get ready for
Christmas present making…
Progress Gallery
-
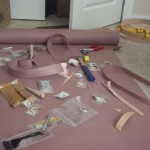
- A fraction of the aforementioned ton.
-
- Cutting out the loops.
-
- Freehanding the edges.
-
- Aww, it’s cute.
-

- Attempt #1, too short
-
- Patterns make everything easier
-
- Mark it with pen, skive until marks no longer show, and repeat…
-
- Works!
-
- That includes the relief holes for the ends of cuts
-
- All the little bits
-
- Marking the shoulder strap holes
-
- Measuring the fold
-
- Skiving the bend
-

- Holes too big? Skive further up to move the bend.
-
- Oops
-
- Getting oiled up. The thinner stock gets darker as it soaks through.
-
- Splotch.
-
- Rough edging around the turns.
-

- Crazy dark by comparison to earlier.
-
- Post installed, rivet guide holes punched.
-
- Innermost pre-rivet glue-up.
-
- Not my brightest moment
-
- Notice the pinched-in center rivets
-
- Fancy! Just some belt holes away from done.
-

- Obligatory puppy tax, as the sights, sounds, and smells from the kitchen table were proving to be irresistible to the fluff butt.
-
- Turns out this style of belt requires a ton of holes.
-
- Handy dandy drill bits
-
- Ooh, shiny!
-
- The finished product